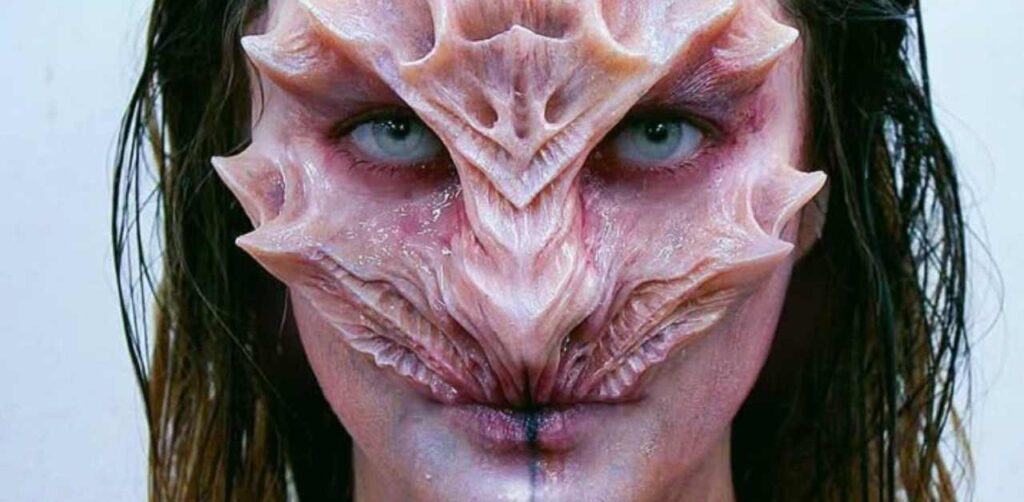
Prosthetic makeup is a specialized branch of special effects (SFX) makeup that involves creating and applying pre-sculpted, molded pieces to an actor’s body to dramatically alter their appearance. These prosthetics, often made from materials like foam latex, silicone, or gelatin, are used to transform actors into characters with unique features, such as fantastical creatures or aged versions of themselves.
Unlike general SFX makeup, which typically involves painting or sculpting directly onto the skin to simulate effects like bruises or burns, prosthetic makeup requires the creation of separate appliances that are adhered to the skin.
This distinction is crucial for beginners to understand, as it influences the tools, materials, and techniques required for each discipline. Mastery of prosthetic makeup demands a combination of artistic skill and technical knowledge, making it a rewarding yet challenging area for aspiring makeup artists.
Must-have Essential Tools & Materials for Prosthetic Makeup Artists

| Category | Item | Purpose |
| Sculpting & Molding | Chavant Clay | Oil-based clay ideal for sculpting prosthetic designs. |
| Sculpting Tools | Metal and wooden tools for shaping and detailing clay models. | |
| Life Casting Materials | Alginate and plaster bandages for creating molds of body parts. | |
| Prosthetic Materials | Gelatin | Flexible material suitable for small prosthetics; easy to melt and mold. |
| Foam Latex | Lightweight and breathable; ideal for larger applications like masks. | |
| Silicone (e.g., PlatSil Gel) | Durable and skin-like; ideal for realistic prosthetics. | |
| Adhesives & Sealers | Pros-Aide | Medical-grade adhesive known for strong hold and skin safety. |
| Telesis Adhesive | Flexible adhesive suitable for sensitive skin. | |
| Cap Plastic | Used to encapsulate silicone pieces, allowing seamless blending with the skin. | |
| Application Tools | Sponges and Cotton Swabs | For applying adhesives and blending edges. |
| Brushes | Various sizes for painting and detailing prosthetics. | |
| Palette Knives | Useful for mixing materials and applying modeling compounds. | |
| Coloring & Detailing | Alcohol-Activated Paints | Provide realistic skin tones and effects. |
| Makeup Sealers | Ensure longevity of applied colors. | |
| Fake Blood and Waxes | For creating wounds, scars, and other effects. | |
| Removal & Cleaning | Adhesive Removers (e.g., Super Solv) | Safely dissolve adhesives without harming the skin. |
| Cleansing Oils | Gentle on the skin; effective in removing residual makeup. | |
| Sanitizers and Disinfectants | Keep your tools clean and hygienic. |
Step-by-Step Guide to Creating Prosthetics
Prosthetic makeup is a fascinating art form that allows you to transform actors into fantastical creatures, aged characters, or wounded survivors. While the process may seem complex at first, breaking it down into clear steps makes it accessible even for beginners. This guide will walk you through the entire process – from initial design to final application – with professional tips to help you achieve realistic results.
1. Concept & Design Phase
Every great prosthetic begins with careful planning:
- Start with sketches – Draw your desired effect from multiple angles
- Study real references – Examine photos of actual wounds, aging skin, or animal textures
- Consider movement – Design pieces that won’t restrict facial expressions
- Choose placement wisely – Forehead and cheek prosthetics are most beginner-friendly
Professional makeup artists often create miniature clay models before full-size sculpting to test proportions.
2. Sculpting Your Masterpiece
The sculpting stage brings your design to life:
- Use oil-based clay (like Monster Clay) for detailed work
- Build up gradually – Start with basic shapes before adding details
- Create texture – Use various tools to mimic pores, wrinkles, or scales
- Check proportions – Frequently view your sculpt from all angles
- Smooth transitions – Blend edges where the prosthetic will meet skin
Remember: Your sculpt’s quality directly affects the final prosthetic’s realism.
3. Mold Making Process
Creating a durable mold preserves your sculpt for multiple castings:
- Apply mold release to prevent sticking
- Build containment walls around your sculpt
- Choose mold material – Silicone for flexibility, plaster for budget options
- Pour carefully to avoid air bubbles
- Cure completely before demolding (follow product instructions)
Tip: Number multi-part molds to ensure proper alignment during casting.
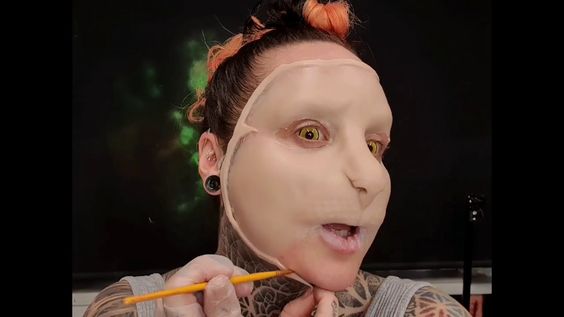
4. Casting the Prosthetic
This stage transforms your mold into wearable pieces:
- Select appropriate material:
- Latex for quick, flexible pieces
- Foam latex for lightweight, breathable prosthetics
- Gelatin for ultra-realistic but temporary effects
- Apply thin, even layers when brushing in latex
- Control thickness – Thicker areas last longer but may restrict movement
- Cure properly – Rushing this stage leads to weak prosthetics
Many professionals make several test castings before achieving perfect results.
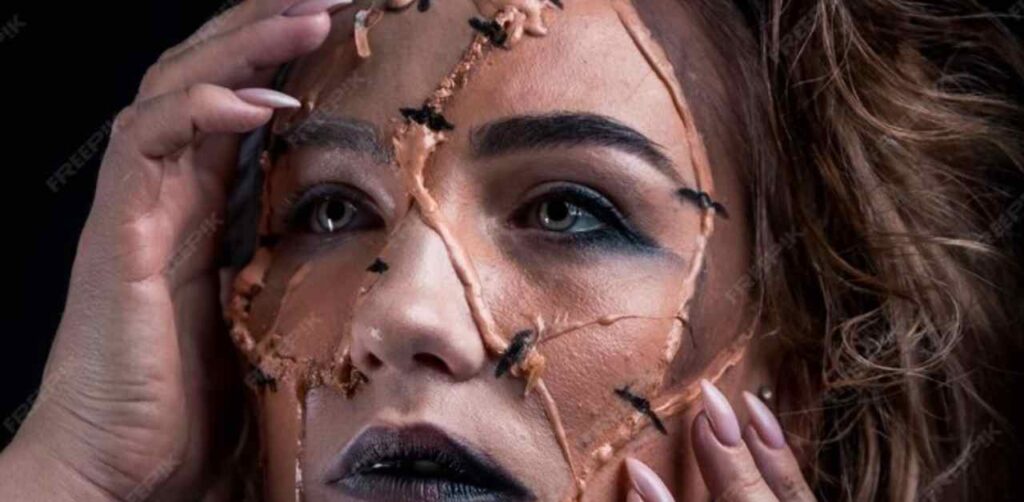
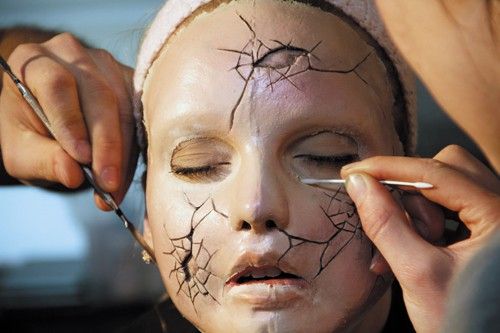
5. Application Techniques
Proper application makes the difference between obvious and seamless effects:
- Prep skin thoroughly – Clean, dry, and alcohol-wiped
- Choose the right adhesive:
- Spirit gum for small pieces
- Pros-Aide for larger, more durable applications
- Apply in sections for large prosthetics
- Blend edges meticulously using latex or silicone sealers
- Color match carefully – Layer translucent colors for natural effects
The most convincing prosthetics disappear into the surrounding skin.
Safe Removal and Aftercare for Prosthetic Makeup
Applying prosthetics is only half the process – proper removal and aftercare are crucial for protecting your skin and preserving your prosthetic pieces. Whether you’re working on yourself or a client, follow these professional techniques to ensure safe, comfortable removal while maintaining skin health.
Step 1: Gentle Removal Process
Tools Needed:
- Adhesive remover (oil-based or alcohol-based)
- Cotton pads or swabs
- Blunt-edged tool (like a orange stick)
- Mild cleanser
- Soft towel
Step-by-Step Removal:
- Start at the edges – Apply remover with a cotton swab along the prosthetic’s perimeter
- Work slowly – Allow the solvent to break down the adhesive (30-60 seconds)
- Lift carefully – Use your fingers or a blunt tool to gently peel upward
- Remove residue – Clean remaining adhesive with additional remover
- Cleanse skin – Use a pH-balanced cleanser to remove all product traces
Pro Tip: For large prosthetics, remove in sections rather than pulling the entire piece at once.
Step 2: Skin Recovery & Aftercare
After removal, your skin needs special attention:
Immediate Care:
- Apply cool compress if skin appears irritated
- Use aloe vera gel or fragrance-free moisturizer
- Avoid harsh products for 24 hours
Overnight Recovery:
- Sleep on clean pillowcases
- Apply healing ointment (like Aquaphor) if needed
- Skip makeup on treated areas next day
For Sensitive Skin:
- Try cucumber slices or chamomile tea bags to soothe redness
- Use hypoallergenic barrier cream before future applications
Step 3: Prosthetic Maintenance
Proper care extends your prosthetic’s lifespan:
Cleaning:
- Remove all makeup with 99% isopropyl alcohol
- Gently wash with mild soap (for silicone pieces)
- Air dry completely on a clean surface
Storage:
- Keep in airtight container with parchment paper
- Store flat to prevent warping
- Label pieces with application date
Reuse Guidelines:
- Latex prosthetics: 3-5 uses
- Silicone prosthetics: 10+ uses with proper care
- Discard if edges fray or adhesive won’t stick
Troubleshooting Common Issues
Problem: Redness/irritation
Solution: Apply 1% hydrocortisone cream and avoid reapplication for 48 hours
Problem: Stubborn adhesive
Solution: Olive oil or coconut oil can help dissolve tough residue
Problem: Prosthetic tearing
Solution: Repair small tears with liquid latex or silicone glue
Tips and Tricks for Beginners
- Start with small, simple pieces like nose scars or elf ears before attempting full-face prosthetics
- Always prep skin properly – clean, dry, and use rubbing alcohol to remove oils
- Use reference photos of real wounds, aging skin, or creature textures for realism
- Warm prosthetics slightly before application for better flexibility
- Apply adhesive in thin layers – too much creates visible lumps
- Blend edges carefully using a stippling motion rather than swiping
- Layer makeup colors (apply yellows/reds first, then add blues/greens for depth)
- Remove slowly and gently using proper adhesive removers
- Clean and store prosthetics flat in airtight containers between uses
- Practice texture techniques daily (try replicating tree bark or orange peel in clay)
- Keep a makeup journal to record what works and what doesn’t
- Invest in quality adhesives – they make or break your application
- Test all products on a small skin area first to check for reactions
- Work under good lighting to spot blending issues
- Be patient – prosthetic makeup skills develop over time
Conclusion
Prosthetic makeup is an exciting and rewarding art form that allows you to transform appearances with creativity and skill.
While mastering it takes practice, patience, and the right techniques, every beginner can achieve impressive results by starting small, learning proper application and removal, and continuously refining their craft. Remember that even Hollywood professionals began with simple projects—what matters most is your willingness to experiment, learn from mistakes, and develop your unique style.
Whether you’re pursuing special effects as a career or simply exploring it as a hobby, the key is to enjoy the process. Keep practicing, stay inspired by other artists’ work, and most importantly, have fun bringing characters to life through the magic of prosthetics!
Must Read Article?
How to Make SFX Makeup Prosthetics
How to Make SFX Makeup Prosthetics
What is Prosthetic Makeup? A Complete Guide to FX Makeup Effects